Introduction
Hey everyone!
After building the backend of my to-do app with Go (if you missed it, you can catch up here), It's time to bring the frontend to life.
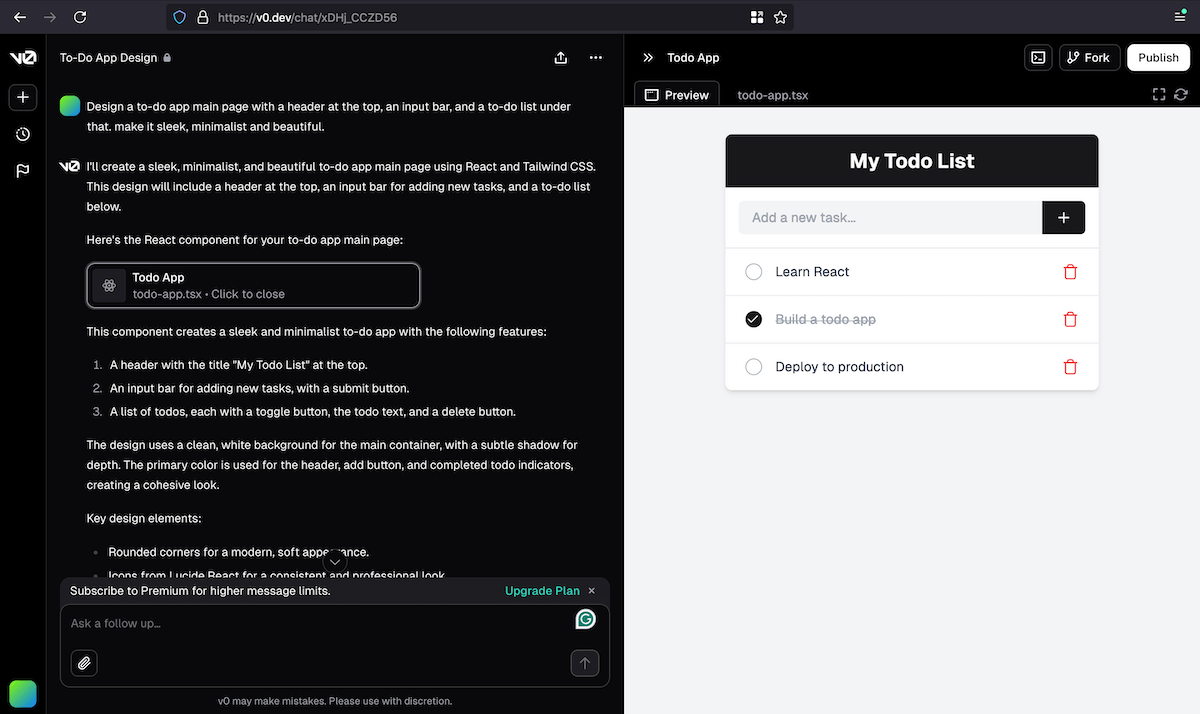
I wanted to try something new, so I used Vercel's v0.dev/chat to generate the initial design. It turned out to be a pretty smooth experience (which is never the case for me 😂), So I want to share how it all came together.
Quick Recap
Just to recap, I previously built a simple RESTful API using Go, Gin, and GORM, connected to a PostgreSQL database. I deployed it on Fly.io, and it's ready to serve data to our frontend.
Now, I wanted to build a modern frontend using Next.js 14 with TypeScript and Tailwind CSS, utilizing the new Next.js App Router. Let's dive into how I did it.
Generating the Frontend Design with v0.dev

Generate UI with shadcn/ui from simple text prompts and images.
I came across v0.dev, an AI tool from Vercel that helps generate UI code. And this one is particularly intersting becuase this app Generates UI's with shadcn/ui.
I thought it might save me some time and give me a fresh perspective, so I gave it a shot.
v0.dev Prompt & Generation
This was my actual prompt:
"Design a to-do app main page with a header at the top, an input bar, and a to-do list under that. make it sleek, minimalist and beautiful"
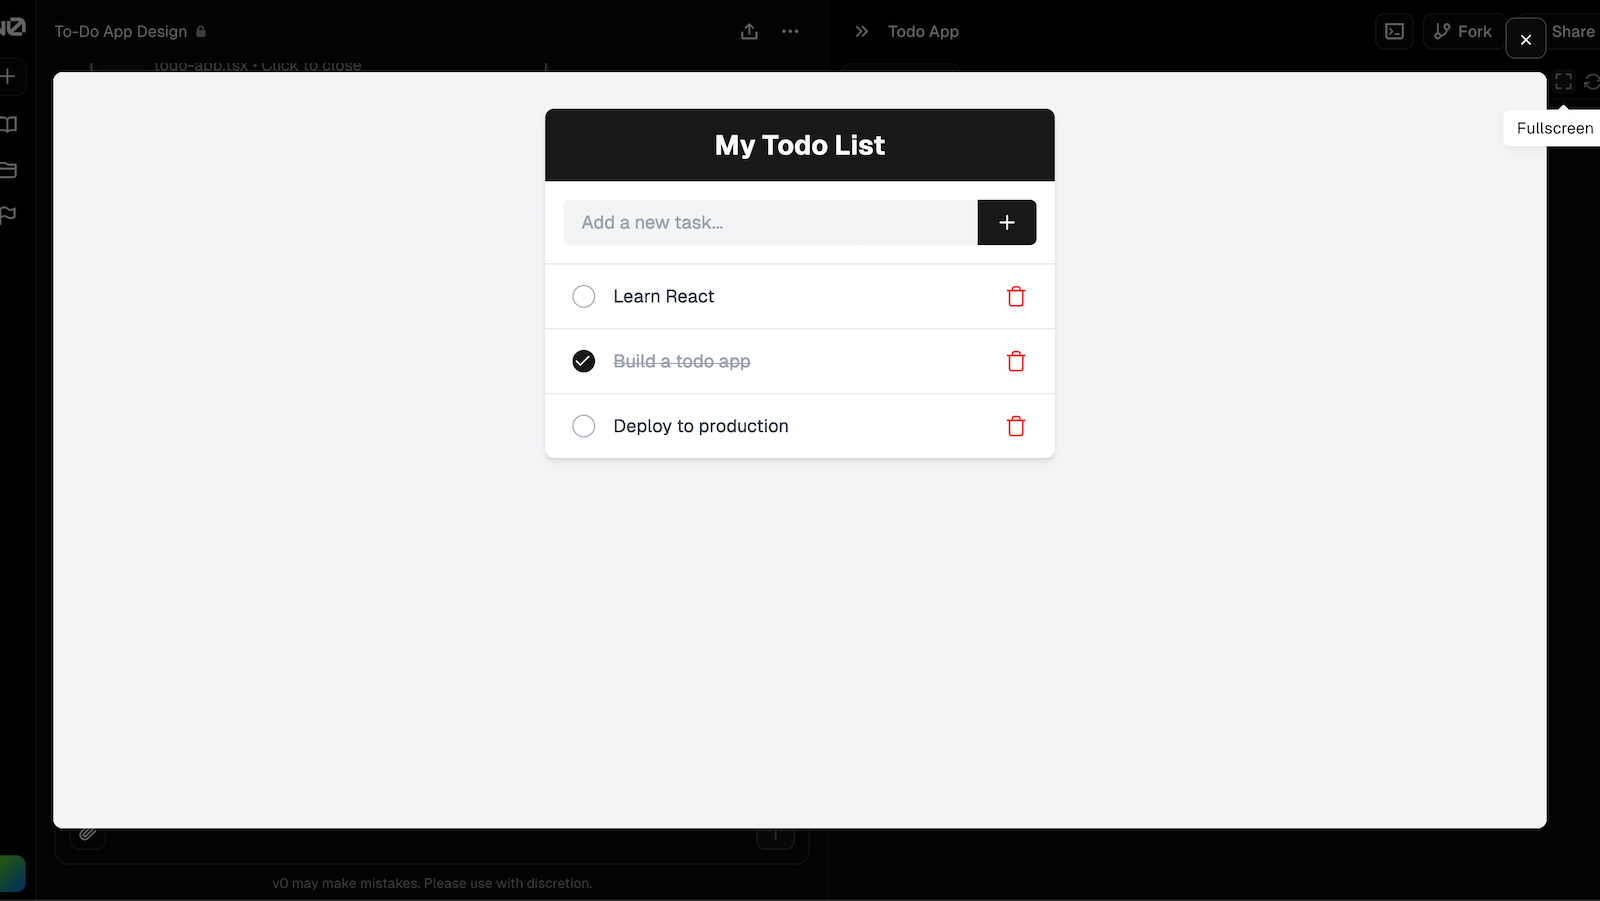
The result? A pretty decent starting point:

v0.dev generated the initial code for me, which was a great starting point, but obviously I needed to make some adjustments to fit my needs:
- Updated the styling to match my preferences.
- Ensured the components were using TypeScript properly.
- Adjusted the layout for responsiveness and accessibility.
Building the Frontend
- Setting Up the Next.js Project
I created a new Next.js project with TypeScript support, inside the a "frontend" folder:
npx create-next-app@latest go-frontend --typescript
cd go-frontend
Creating the Components
- AddTodo Component
This component lets users add new tasks.
// components/AddTodo.tsx
'use client';

import React, { useState } from 'react';

interface AddTodoProps {
  onAdd: (title: string) => void;
}

const AddTodo: React.FC<AddTodoProps> = ({ onAdd }) => {
  const [title, setTitle] = useState('');

  const handleSubmit = (e: React.FormEvent) => {
    e.preventDefault();
    if (title.trim()) {
      onAdd(title);
      setTitle('');
    }
  };

  return (
    <form onSubmit={handleSubmit} className="flex my-4">
      <input
        type="text"
        placeholder="Add a new task"
        value={title}
        onChange={(e)=> setTitle(e.target.value)}
        className="flex-grow p-2 border rounded-l"
      />
      <button type="submit" className="p-2 bg-blue-500 text-white rounded-r">
        Add
      </button>
    </form>
  );
};

export default AddTodo;- TodoItem Component
Displays each task with options to edit, complete, or delete.
// components/TodoItem.tsx
'use client';

import React, { useState } from 'react';

interface TodoItemProps {
  id: number;
  title: string;
  completed: boolean;
  onToggle: (id: number) => void;
  onDelete: (id: number) => void;
  onEdit: (id: number, title: string) => void;
}

const TodoItem: React.FC<TodoItemProps> = ({
  id,
  title,
  completed,
  onToggle,
  onDelete,
  onEdit,
}) => {
  const [isEditing, setIsEditing] = useState(false);
  const [newTitle, setNewTitle] = useState(title);

  const handleEdit = () => {
    if (isEditing && newTitle.trim() !== title) {
      onEdit(id, newTitle);
    }
    setIsEditing(!isEditing);
  };

  return (
    <li className="flex items-center justify-between py-2">
      <div className="flex items-center">
        <input
          type="checkbox"
          checked={completed}
          onChange={()=> onToggle(id)}
          className="mr-2"
        />
        {isEditing ? (
          <input
            type="text"
            value={newTitle}
            onChange={(e)=> setNewTitle(e.target.value)}
            className="border px-2 py-1"
          />
        ) : (
          <span className={completed ? 'line-through text-gray-500' : ''}>
            {title}
          </span>
        )}
      </div>
      <div>
        <button onClick={handleEdit} className="text-blue-500 hover:underline mr-2">
          {isEditing ? 'Save' : 'Edit'}
        </button>
        <button onClick={()=> onDelete(id)} className="text-red-500 hover:underline">
          Delete
        </button>
      </div>
    </li>
  );
};

export default TodoItem;- TodoList Component
Brings everything together.
// components/TodoList.tsx
'use client';

import React, { useEffect, useState } from 'react';
import AddTodo from './AddTodo';
import TodoItem from './TodoItem';

interface Todo {
  id: number;
  title: string;
  completed: boolean;
}

const TodoList: React.FC = () => {
  const [todos, setTodos] = useState<Todo[]>([]);
  const [loading, setLoading] = useState(true);
  const [showCompleted, setShowCompleted] = useState(true);

  const fetchTodos = async () => {
    try {
      const res = await fetch(`${process.env.NEXT_PUBLIC_BACKEND_URL}/todos`);
      const data = await res.json();
      setTodos(data);
    } catch (error) {
      console.error('Error fetching todos:', error);
    } finally {
      setLoading(false);
    }
  };

  useEffect(() => {
    fetchTodos();
  }, []);

  const addTodo = async (title: string) => {
    // ...code to add todo
  };

  const toggleTodo = async (id: number) => {
    // ...code to toggle todo
  };

  const editTodo = async (id: number, title: string) => {
    // ...code to edit todo
  };

  const deleteTodo = async (id: number) => {
    // ...code to delete todo
  };

  const currentTasks = todos.filter((todo) => !todo.completed);
  const completedTasks = todos.filter((todo) => todo.completed);

  return (
    <div>
      <AddTodo onAdd={addTodo} />
      {loading ? (
        <p>Loading...</p>
      ) : (
        <>
          {/* Current Tasks */}
          {currentTasks.length > 0 && (
            <div>
              <h2>Current Tasks</h2>
              <ul>
                {currentTasks.map((todo) => (
                  <TodoItem
                    key={todo.id}
                    {...todo}
                    onToggle={toggleTodo}
                    onDelete={deleteTodo}
                    onEdit={editTodo}
                  />
                ))}
              </ul>
            </div>
          )}
          {/* Completed Tasks */}
          {completedTasks.length > 0 && (
            <div>
              <h2>
                Completed Tasks
                <button onClick={()=> setShowCompleted(!showCompleted)}>
                  {showCompleted ? 'Hide' : 'Show'}
                </button>
              </h2>
              {showCompleted && (
                <ul>
                  {completedTasks.map((todo) => (
                    <TodoItem
                      key={todo.id}
                      {...todo}
                      onToggle={toggleTodo}
                      onDelete={deleteTodo}
                      onEdit={editTodo}
                    />
                  ))}
                </ul>
              )}
            </div>
          )}
        </>
      )}
    </div>
  );
};

export default TodoList;- Main Page.
Updated app/page.tsx to render the TodoList:
// app/page.tsx
import React from 'react';
import TodoList from '../components/TodoList';

const HomePage: React.FC = () => (
  <main className="container mx-auto p-4">
    <TodoList />
  </main>
);

export default HomePage;
Integrating with Our Go Backend on Fly.io
Remember our backend deployed on Fly.io? Time to make our frontend and backend BFFs.
- Setting the Backend URL
In .env.local:
NEXT_PUBLIC_BACKEND_URL=https://your-backend.fly.dev
- Handling CORS on the Backend
Our frontend needs permission to talk to the backend.
Updated the Go backend's CORS configuration:
import (
  // ...other imports
  "github.com/gin-contrib/cors"
)

func main() {
  // ...previous code

  router := gin.Default()

  router.Use(cors.New(cors.Config{
    AllowOrigins:     []string{"https://your-frontend.vercel.app"},
    AllowMethods:     []string{"GET", "POST", "PUT", "DELETE"},
    AllowHeaders:     []string{"Origin", "Content-Type", "Accept"},
  }))

  // ...rest of the code
}
Deploying the Frontend on Vercel
- Logged into Vercel and imported the GitHub repository.
- Set up the environment variable NEXT_PUBLIC_BACKEND_URL.
- Hit deploy and watched the magic happen! ✨
Things To Keep In Mind
AI Generation: AI can be fun, but it can also make obvious dumb mistakes. It is helpful, but you make the final call, don't forget that.
CORS: Cross-origin requests can be a headache. Ensure both your frontend and backend are configured correctly to communicate.
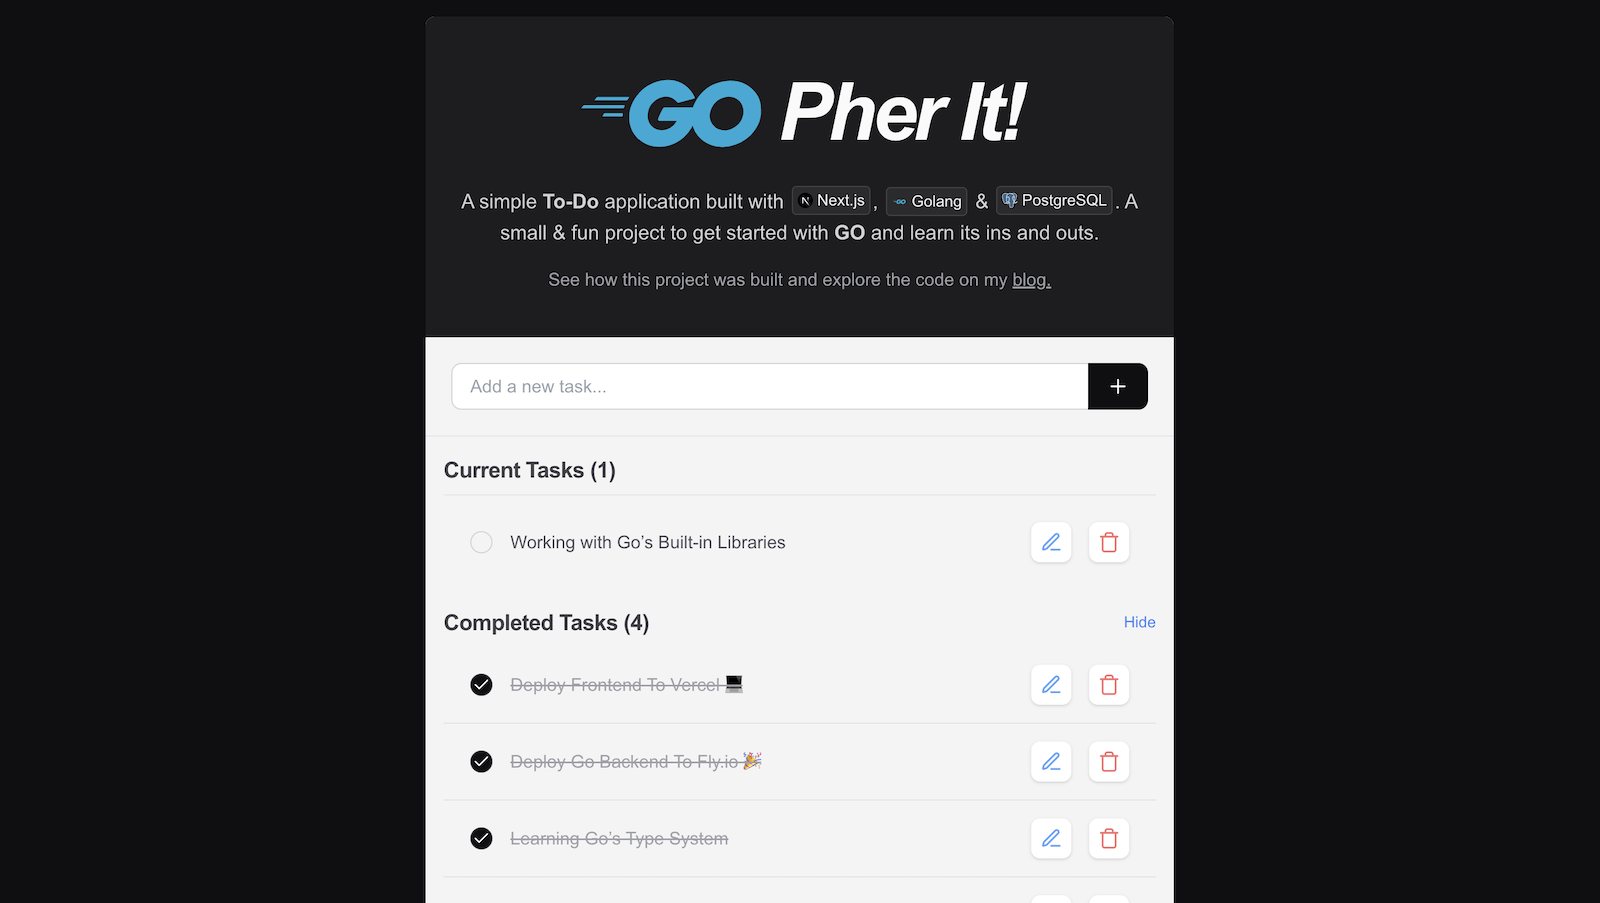
And there you have it! We now have a fully functional to-do app with a Go backend and a Next.js frontend, all tied together with some AI-designed flair. Not too shabby, huh?
Final Thoughts

This project was a blast. Combining Go, Next.js, and AI design tools opened up new horizons for me. If you're considering a similar project, go for it! And don't be afraid to let AI lend a hand—it might just surprise you.
Feel free to check out the repositories:
- Backend GitHub Repo
- Frontend Repo
